A lobby is the setting where players or teams compete, defining various parameters like start time and participant count. To create a lobby, you’ll first select the scenario you want to use. This can be done in two ways:
- From the individual scenario page
- From the events section
Creating a lobby from the individual scenario page
To create a lobby from the scenarios page, you need to select the scenario that you will be using, either by searching or scrolling the scenarios page until you find it. Once you find the scenario of interest, hover over it and click on View more to go to the lobby creation page.
On the scenario page, click the dropdown next to the Start button to view the different options for launching the scenario. To create a lobby, choose Multi Player Mode.
Following the previous step will take you to the lobby creation page. Here, you can configure details such as the lobby name, tags, and parameters, and also add observers to the lobby.
- Lobby name - the name of your lobby.
- Tags - tags associated with your lobby (press ENTER to add your tags)
- Lobby Image - you can add your own custom lobby image, otherwise, the scenario image will be used as the lobby image.
- Parameters - specific lobby rules and options.
Next, you need to define the lobby parameters:
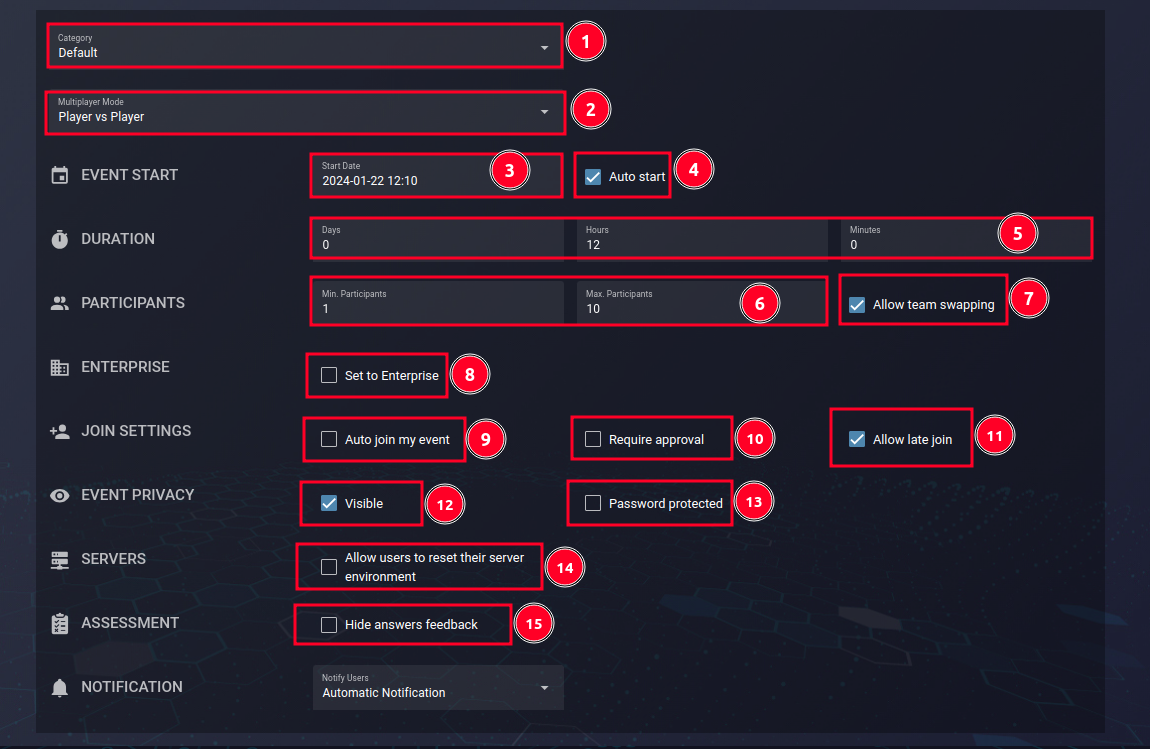
Lobby Parameters
- CATEGORY: Define a category to which the Lobby will be associated, leave to Default if unsure.
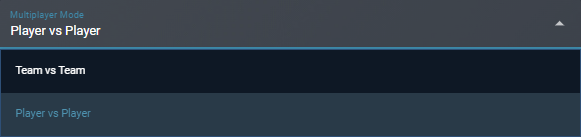
MULTIPLAYER MODE: For multiplayer mode, indicate whether the scenario will be Player vs Player or Team vs Team.
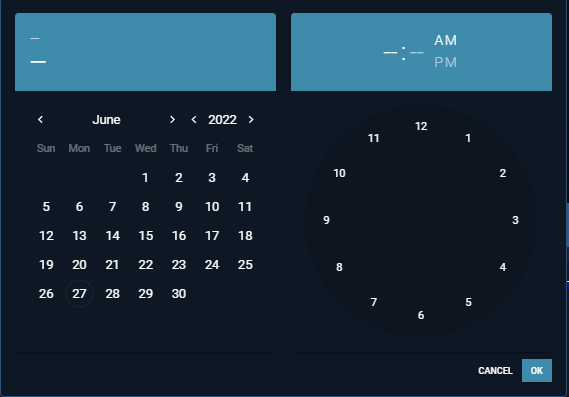
EVENT START: For Lobby Start, provide a date as well as a time when the scenario will start.
- AUTO START: Enable this option to set the lobby to automatically start at the specified event start date.
- DURATION: Duration will allow you to specify the duration for when the scenario will run, normally in days, hours, and minutes.
- PARTICIPANTS: The Participants tab allows you to specify the minimum and maximum number of participants.
- ALLOW TEAM SWAPPING: In Team vs Team mode, enable this option to allow users to move in and out of teams while in the lobby. Disable to restrict.
- ENTERPRISE: This option is used to toggle between Community and Enterprise designations for the lobby. Toggling set’s the lobby to Enterprise platform.
- AUTO JOIN MY EVENT: You can toggle this button on and off, when toggled on, it allows you, the lobby creator, to automatically join your lobby. When toggled off, you would have to join the lobby like a regular user.
- REQUIRE APPROVAL: Toggle this button on and off to allow participants to join the lobby either with or without approval.
- ALLOW LATE JOIN: Toggle this button on and off to allow participants to either join the lobby late or not.
- LOBBY VISIBILITY: You can toggle this button to change the visibility of your lobby to private i.e., the lobby is not listed on the platform and only you, the lobby creator, can see the lobby. This is useful for testing a lobby or running a private lobby
- PASSWORD PROTECTED: Toggle this button to either require a password or not for users to join the lobby. If a password is required, you will be asked to specify that password and share it with users for them to join the lobby.
- ALLOW SERVER ENVIRONMENT RESET: Toggle this button if you wish to allow users the ability to reset their lab environments.
- HIDE ANSWERS FEEDBACK: Toggle this option during a TTX scenario, if you wish to hide feedback shared by the observer.
CHAT: Lobbies now support a simple chat functionality that enables users to send messages in a global chat or during Team vs Team lobbies, amongst their team members.

- TERMINATION: This prevents players from terminating/ ending the session before the event has ended.
Once everything has been correctly entered into the lobby, click on CREATE EVENT.
If everything was entered correctly, your lobby will be created as follows:
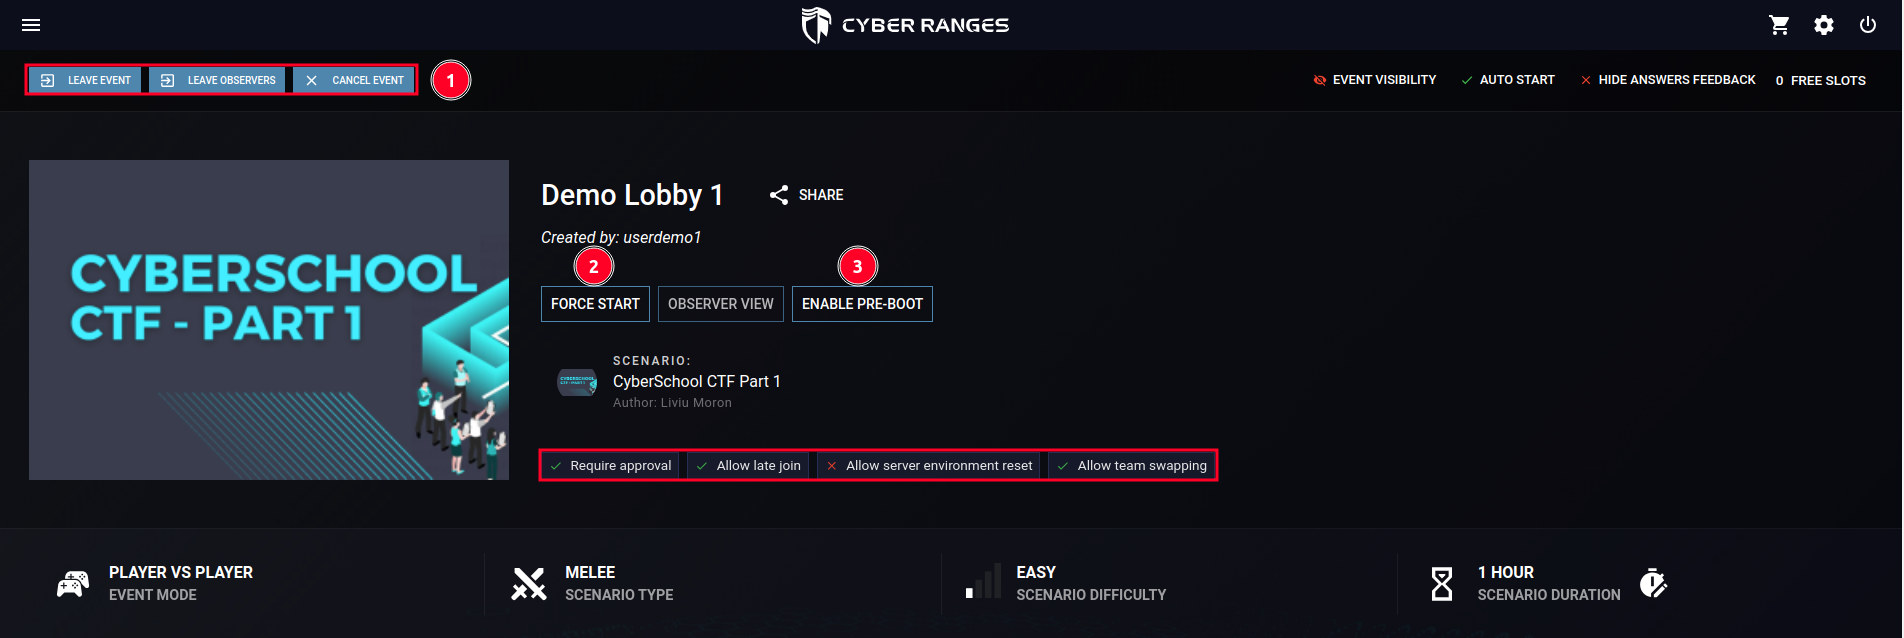
Once your lobby is created, it’s important to note the following:
- You have the option to Cancel the event, Resign as an observer, or Leave the event (if already joined)
- Force Start - Rather than wait for the scheduled start time, you can always force start the session.
- Enable Pre-Boot - boot up the scenario instances in the background for the users that have already joined.
Adding Observers
You can optionally choose to provide observers for your lobby. Observers are users who can manage the lobby, including starting the lobby, viewing participant scores, editing assessments, etc. To add observers, follow the below steps:
1. Click on the OBSERVER VIEW tab, followed by ADD OBSERVER as follows:

You will be asked to provide the username of the observer, as well as asked to specify the level of permission the user can have on the lobby.

Hover on each option to see a description of the role. Once done, that user will be able to join the lobby and carry out the tasks you would like them to do. Observers can also be added to the lobby after it has started.
Prebooting
Prebooting a lobby is an important step, as this particular process will boot up the scenario in the background. Prebooting will create each instance of the scenario for every participant in your lobby (Player or Team). This eliminates the wait time for the scenario to load. When prebooting is enabled, you can check its progress on the top right:
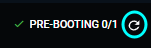
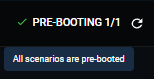
To confirm if the prebooting process is complete: Click on the refresh icon and then, depending on the number of participants you have, which will be represented by the denominator value, you essentially want to wait until the numerator and denominator values are both equal:
Buying up free slots
ONLY ADMINS CAN PERFORM THIS ACTIONThis enables end users, who don’t own the scenario or haven’t subscribed to the scenario, to have access to the scenario in the lobby.
This can be achieved by clicking on the FREE SLOTS, followed by moving the slider to accommodate the number of users you will want to admit freely into your lobby.
Once you have selected the number of free slots, click BUY SLOTS.
Adding Participants to the Lobby
To add users to your lobby, under the Lobby Menu, click on the Add Participant icon
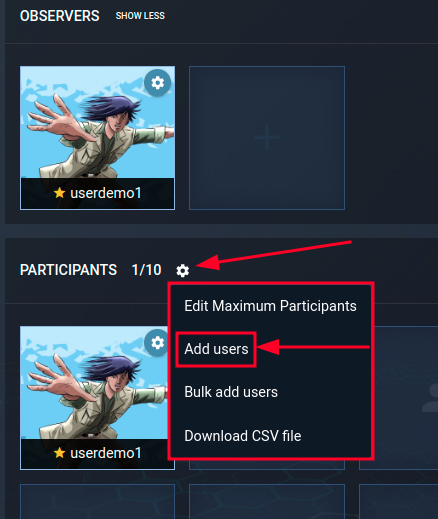
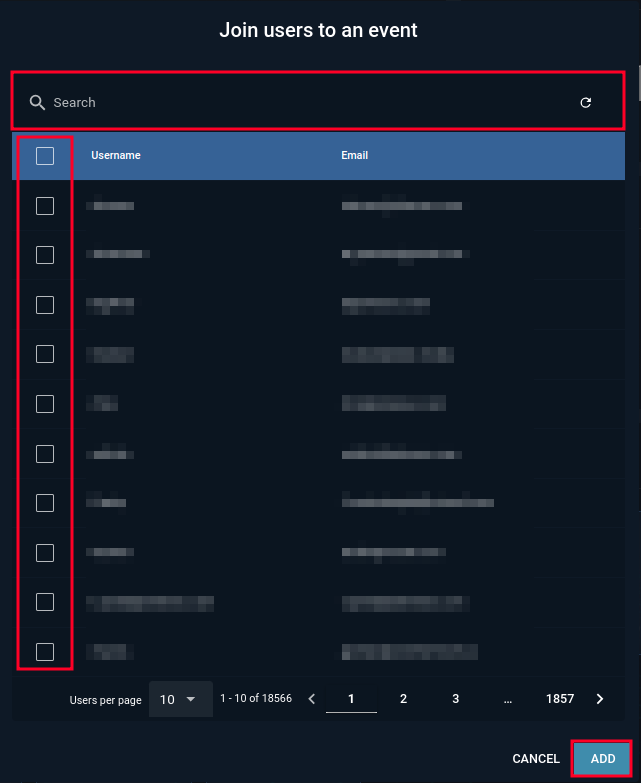
Search for the participant by their username, and add them to the lobby:
Creating a Lobby from the Events Page
To create a lobby from the events page, click on All under EVENTS, then select NEW EVENT, as shown in the screenshot below.
After selecting NEW EVENT, you will be redirected to a page where you can search for the scenario you want to use for the lobby. Enter the name of the desired scenario and click on it. This will take you to the page shown in the screenshot below.
When you select CREATE EVENT, you will be directed to the page where you can define the lobby name, tags, parameters, and add observers to the lobby. These details have been discussed in the previous section.